In the vast world of Ashes of Creation, players often seek to change their server or region for a variety of reasons, such as joining friends on different servers, seeking less crowded environments, or finding servers with better ping times. Whatever your reason, understanding how to switch servers or change regions can enhance your gameplay experience by connecting you with the right community and improving game performance. Moreover, with LagoFast, a potent game enhancer at your disposal, resolving the issue becomes straightforward.
Part 1: Why Change Your Server or Region?
Part 2: Understanding Server Options in Ashes of Creation
Part 3: How to Change Your Server or Region in Ashes of Creation
Part 4: Enhancing Your Gaming Experience with LagoFast
Part 1: Why Change Your Server or Region?
Changing servers or regions in Ashes of Creation can be driven by several factors:
- Community and Language: Players may look to join servers with a predominant language or community to enhance communication and teamwork.
- Performance: Reducing latency by choosing a server closer to your geographical location can significantly improve your gameplay experience.
- Friends and Guilds: If friends or guild members play on a different server, switching can allow you to join them.
Part 2: Understanding Server Options in Ashes of Creation
Before you proceed to change your server, it’s important to understand the structure of servers in Ashes of Creation:
- Regional Servers: The game typically offers separate servers for North America, Europe, Asia, and other regions to optimize performance for players in those areas.
- Server Types: Depending on the game updates, there might be various types of servers available, such as PvP-focused or PvE-focused servers.
Part 3: How to Change Your Server or Region in Ashes of Creation
Step 1: Check Server Availability
Before attempting to switch servers, you need to check the availability of servers in your desired region:
- Visit the Official Website: Information about server status and availability is typically provided on the Ashes of Creation official website or through their community updates.
- In-Game Server List: Most MMORPGs, including Ashes of Creation, provide a server list directly in the game’s menu.
Step 2: Prepare for the Server Change
Prepare for the transition to ensure a smooth server change:
- Character Considerations: Understand the policies regarding characters when changing servers, such as whether your character’s progress and items will transfer.
- Backup Important Data: Always ensure that any important game settings or character data are backed up before making the change.
Step 3: Changing the Server
- In-Game Menu: Log into Ashes of Creation and navigate to the main menu.
- Settings/Account Options: Access the settings or account options where server or region changes can typically be made.
- Select New Server/Region: Choose the server or region from the list available that best meets your requirements.
Step 4: Confirm and Test the Change
After changing servers, it’s important to confirm the change and test for any potential issues:
- Confirm Server Details: Ensure that the server change reflects in your settings or on your account dashboard.
- Test Connectivity and Latency: Log into the game and play for a while to test connectivity and latency to ensure that the new server offers a better experience.
Additional Tips
- Watch for Transfer Windows: Some games only allow server changes during specific windows or require special conditions to be met, so keep an eye out for announcements from the game developers.
- Cost Implications: Be aware that some games may charge a fee for server or region changes.
Part 4: Enhancing Your Gaming Experience with LagoFast
For gamers struggling with slow game speeds and connection issues, LagoFast offers a streamlined solution to optimize your online gaming experience. This game booster not only stabilizes your connection but also improves game performance through its easy-to-use platform. Here’s how you can get started with LagoFast to solve your gaming woes.
Quick Guide to Using LagoFast
Step 1: Begin by downloading LagoFast. Simply click the “Free Trial” button on their website to get started.
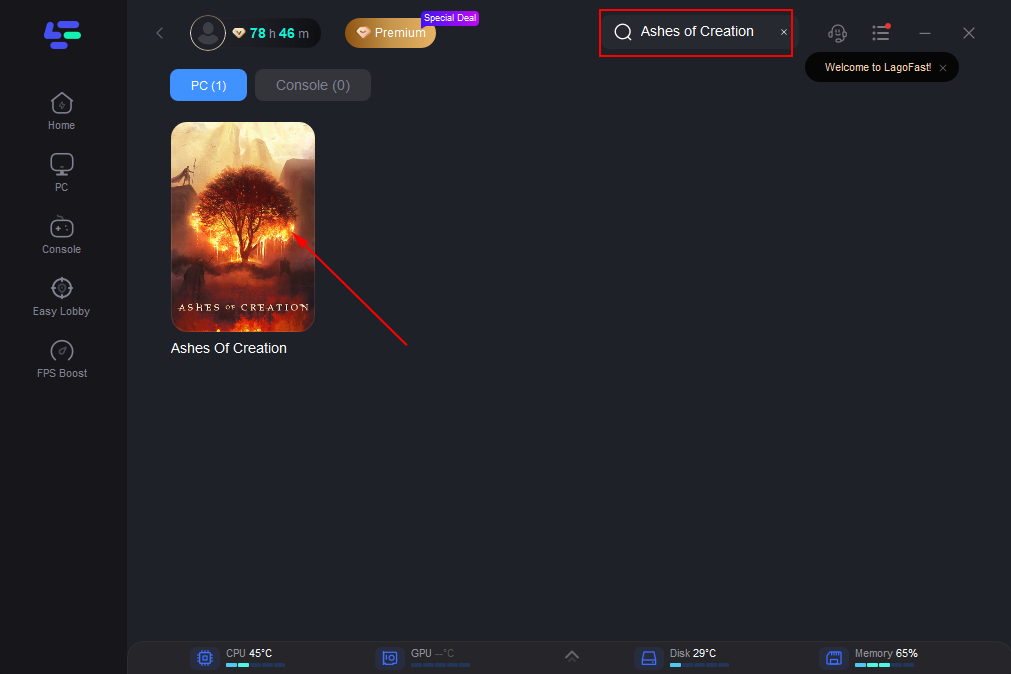
Step 2: Open LagoFast and search for your game before launching it to ensure it can be optimized.
Step 3: To connect to stable servers, click on “Select Server,” and then choose the most effective Node by clicking on the “Node” option on the right.
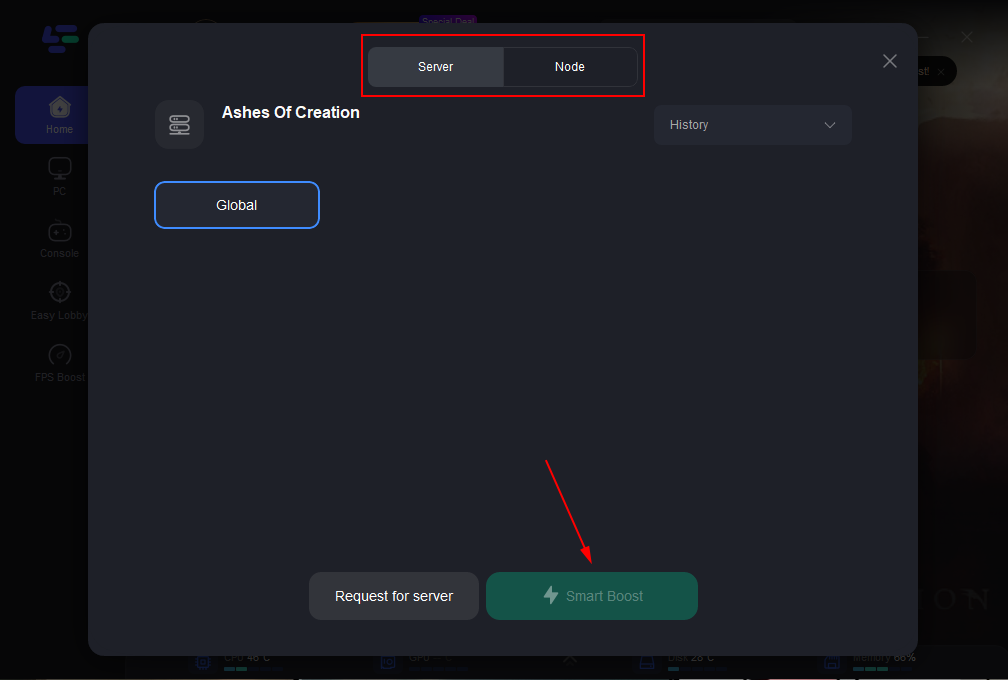
Step 4: Activate the “Smart Boost” button. This will display your game’s ping, packet loss, and the type of network connection on the right side of the dashboard, allowing you to monitor the improvements in real-time.
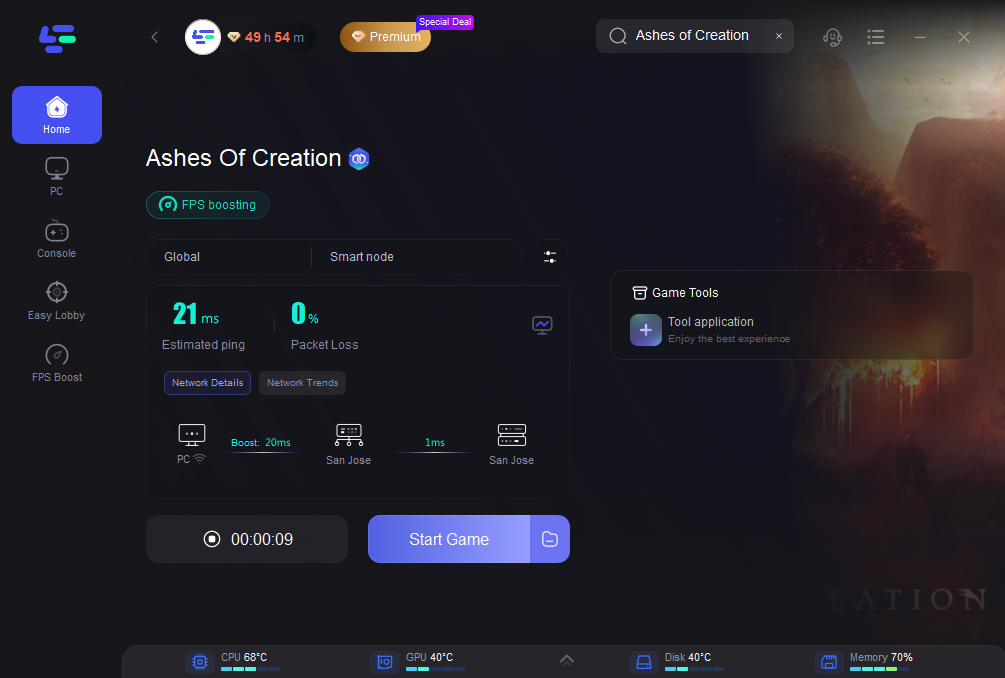
Whether you’re a competitive player looking to gain an edge in fast-paced environments or a casual player tired of connectivity issues, LagoFast provides the tools you need to upgrade your gaming experience. Give it a try and see the difference it makes in your favorite online games.
Conclusion
Changing your server or region in Ashes of Creation can open up new opportunities for gameplay and community interaction. By following the steps outlined above, players can ensure they choose the best server for their gaming needs and preferences. Always stay updated with the latest from the Ashes of Creation community for any new options or restrictions related to server changes.

Boost Your Game with LagoFast for Epic Speed
Play harder, faster. LagoFast game booster eliminates stutter and lags on PC, mobile, or Mac—win every match!
Quickly Reduce Game Lag and Ping!
Boost FPS for Smoother Gameplay!
