Marvel Rivals players often face connectivity issues that can dampen the excitement of the game. Whether it’s lag, high ping, or trouble connecting to the server, changing your server in Marvel Rivals might be the solution you need. Moreover, with LagoFast, a powerful game booster, you’ll be able to change your game server easily.
Part 1: Understanding Marvel Rivals Server Locations
Part 2: How to Change Your Server in Marvel Rivals
Part 3: Troubleshooting Connection Issues in Marvel Rivals
Part 4: Best Solution to Change Server without High Ping in Marvel Rivals: LagoFast
Part 1: Understanding Marvel Rivals Server Locations
Marvel Rivals hosts multiple servers across various regions to ensure that players worldwide can enjoy smooth gameplay. Knowing the server locations can help you choose the best server based on your geographical location. While the exact locations of these servers are generally not publicized to maintain server security and integrity, you can generally expect them to be strategically placed in major regions such as North America, Europe, Asia, and more.
Part 2: How to Change Your Server in Marvel Rivals
Changing your server in Marvel Rivals can help improve your connection by reducing lag and latency. Here’s how you can change servers:
Step 1: Access the Settings Menu
Start the game and navigate to the main menu. From there, access the settings menu where server and region settings are usually found.
Step 2: Select ‘Server’ or ‘Region’
In the settings menu, look for options labeled ‘Server’ or ‘Region.’ Some games automatically assign you to a server based on your location, but Marvel Rivals typically allows manual selection.
Step 3: Choose Your Preferred Server
Select the server or region that you believe will offer the best performance. This might be the server closest to your physical location or a server where you have friends you want to join.
Step 4: Save Changes and Restart the Game
After selecting your new server, make sure to save any changes. You may need to restart the game for the changes to take effect.
Part 3: Troubleshooting Connection Issues in Marvel Rivals
If you’re having trouble connecting to the Marvel Rivals server, here are a few tips that might help:
- Check Server Status: Before making any changes, check if the servers are active and running without issues. Sometimes the problem might be with server maintenance or downtime.
- Improve Your Internet Connection: Use a wired connection if possible, as this provides a more stable and faster internet connection compared to Wi-Fi.
- Close Background Applications: Ensure that no unnecessary applications are running in the background that could be consuming bandwidth or affecting your game’s performance.
- Use a VPN: If you’re experiencing regional restrictions or want to access servers in other regions, using a VPN might help. However, be cautious as some games may have policies against VPN usage.
Part 4: Best Solution to Change Server without High Ping in Marvel Rivals: LagoFast
When connectivity issues arise in Marvel Rivals, using a game booster like LagoFast can make all the difference. This tool optimizes your network connection, reduces lag, and ensures a smoother gaming experience.
Benefits of Using LagoFast for Marvel Rivals
- Change Server: LagoFast provides access to a vast network of servers around the world, ensuring that you can find a stable connection no matter where you are.
- Reduced Lag: Stabilizes your connection and minimizes latency for smoother gameplay.
- Lower Ping: Optimizes your network to achieve consistently low ping, enhancing responsiveness.
- Improved Connectivity: Helps bypass server congestion and connects you to the most stable servers.
- Real-Time Monitoring: Displays ping, packet loss, and other stats, letting you fine-tune your settings for optimal performance.
- User-Friendly Interface: Simple setup and intuitive controls make it easy to use, even for non-tech-savvy gamers.
- Cross-Game Compatibility: Works with a variety of online games, ensuring reliable performance across titles.
Steps to Use LagoFast for Marvel Rivals PC:
1. Download LagoFast: Start by downloading it from the official website and install the program.
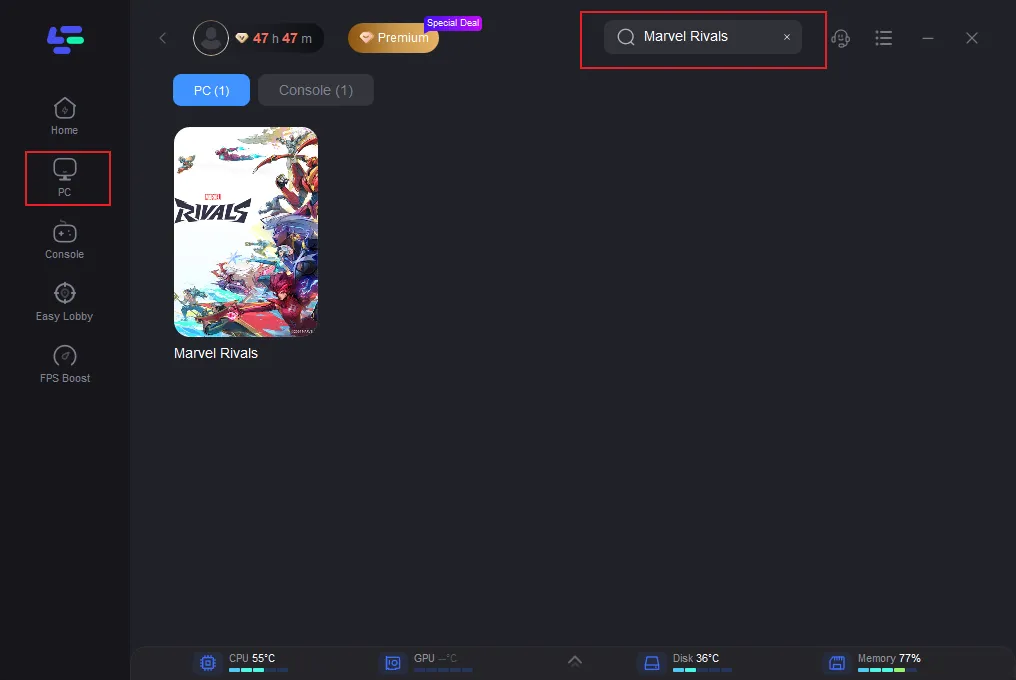
2. Search for Marvel Rivals: Open LagoFast and find the game in the app’s search bar.
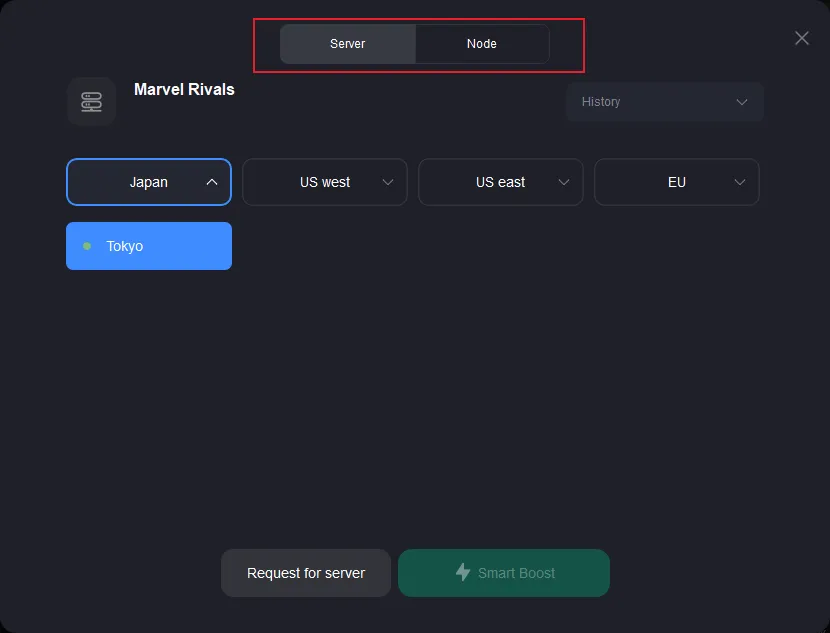
3. Select the Best Server: Choose a stable server by clicking “Select Server” then pick a suitable node.
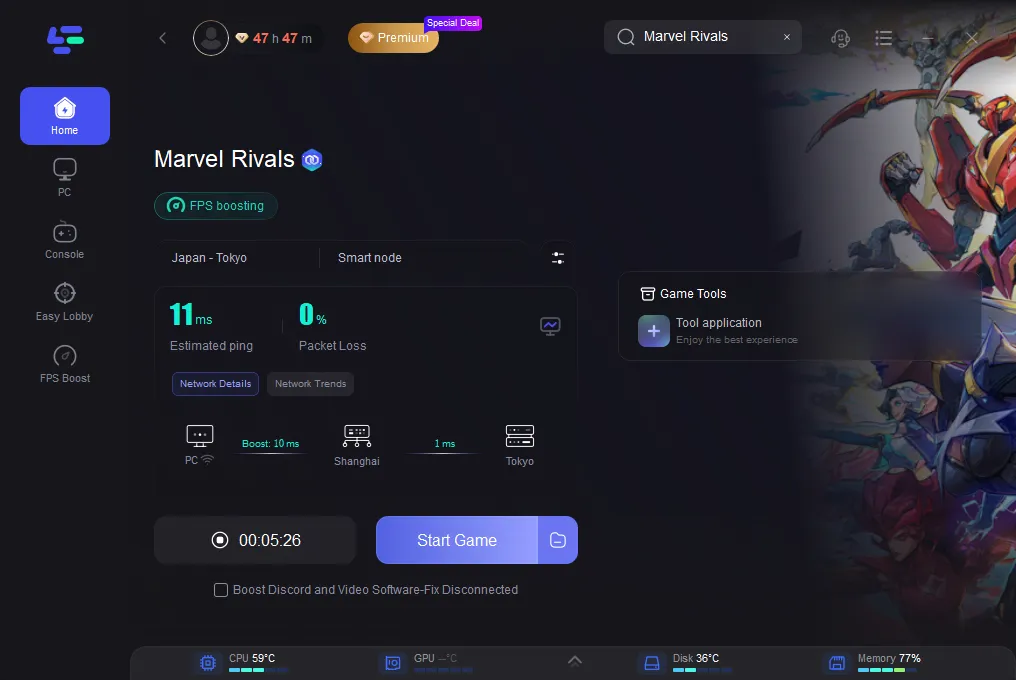
4. Enable Smart Boost: Click “Smart Boost” to view real-time stats like ping and packet loss, ensuring optimal network performance.
Tutorial to Use LagoFast Box to enhance your console gaming experience:
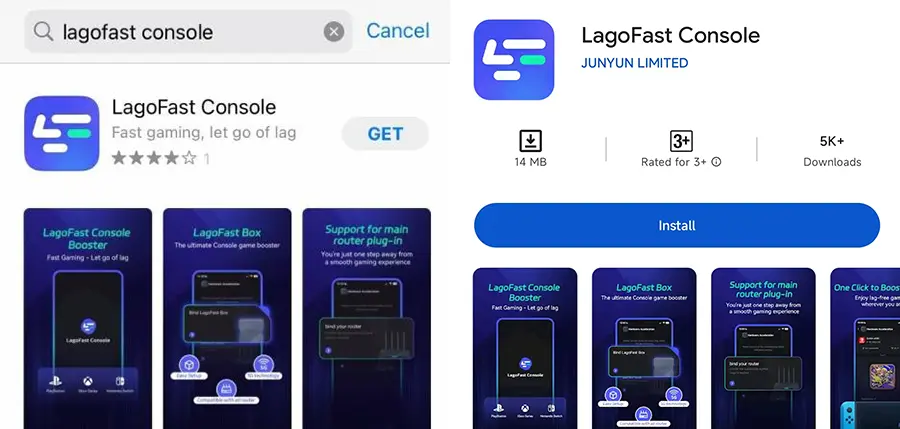
Step 1: Download the LagoFast Console App on your phone to control the LagoFast Box.
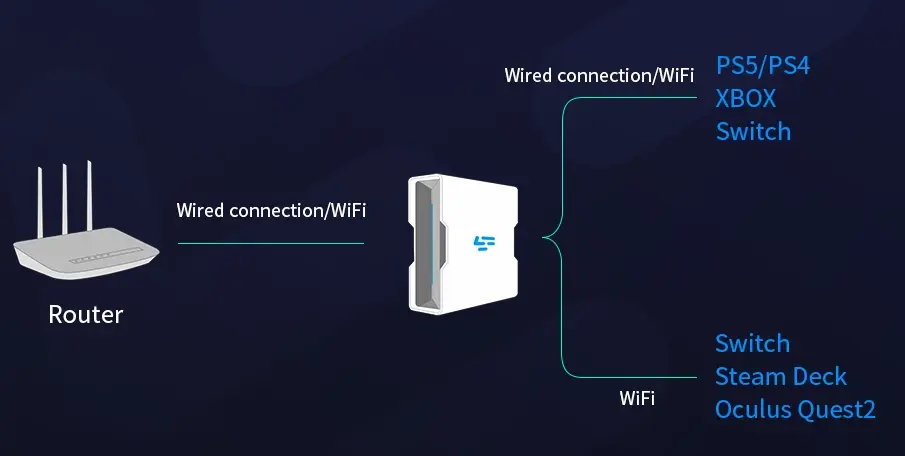
Step 2: Establish a connection between your LagoFast Box, router, and console, choosing between a wired or wireless connection.
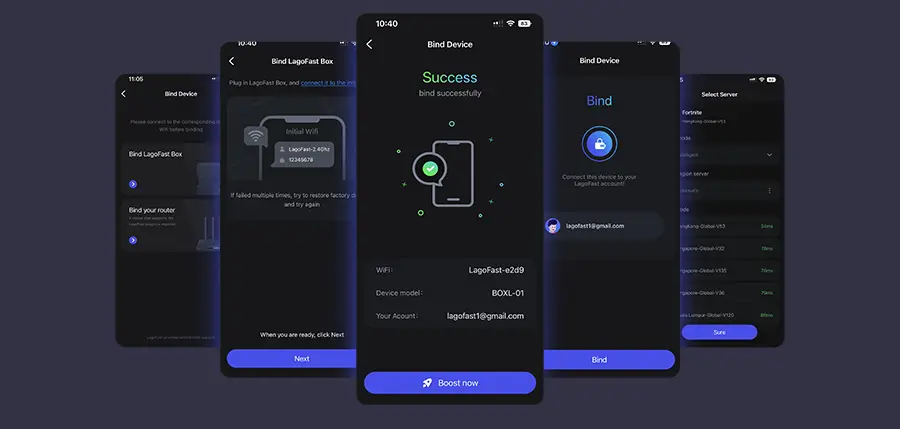
Step 3: Launch the LagoFast Console App and boost Marvel Rivals. Once you have completed the binding process with the LagoFast Box, proceed to boost this game within the LagoFast Console App.
With LagoFast, you can bypass server-related issues and enjoy seamless gameplay without interruptions. LagoFast is a simple yet powerful solution for fixing server connection problems and lag in Marvel Rivals. By following the quick steps above, you can optimize your connection and dive back into the action with minimal delays.
LagoFast ensures you enjoy a hassle-free gaming experience in Marvel Rivals and beyond.
Conclusion
Changing your server in Marvel Rivals can significantly enhance your gaming experience by improving your connection speed and reducing latency. By following the steps outlined above, you can select the optimal server and troubleshoot common connectivity issues.
Boost Your Game with LagoFast for Epic Speed
Play harder, faster. LagoFast game booster eliminates stutter and lags on PC, mobile, or Mac—win every match!
Quickly Reduce Game Lag and Ping!
Boost FPS for Smoother Gameplay!
