
Overwatch 2 is a highly anticipated sequel to the immensely popular team-based multiplayer first-person shooter game, Overwatch. Developed and published by Blizzard Entertainment, Overwatch 2 builds upon the foundation of its predecessor while introducing new heroes, maps, game modes, and an expanded narrative experience.
With an engaging story mode, enhanced graphics, and a commitment to evolving the multiplayer experience, Overwatch 2 promises to captivate both new and returning players alike.
However, in Overwatch 2, few things are as frustrating as a sudden disconnect from a match, especially in a highly competitive game like Overwatch 2. These unexpected interruptions, often referred to as client-requested disconnects, can significantly impact the gaming experience for both players and teams.
In this article, we delve into the intricacies of client-requested disconnects in Overwatch 2, exploring their causes and viable solutions.
Part 1: What Does Client-Requested Disconnect Mean in Overwatch 2?
Part 2: How to Fix Client-Requested Disconnect in Overwatch 2?
Part 3: How to Ensure Overwatch 2 Gaming Experience?
What Does Client-Requested Disconnect Mean in Overwatch 2?
In Overwatch 2, a “Client-Requested Disconnect” typically refers to a situation where a player is involuntarily disconnected from the game due to an issue originating from their client.
This error message commonly occurs when there’s a disruption in the connection between the player’s client and the game server, resulting in the player being removed from the match.
It can happen for various reasons, such as network instability, software conflicts, or other technical issues. When players encounter this error, they are usually required to reconnect by logging back into the game to resume playing.
You may like:How to Resolve Overwatch 2 Stuck on Loading Screen Issues
How to Fix Client-Requested Disconnect in Overwatch 2?
Here are the best ways to fix Client-Requested Disconnect in OW2:
1. Network Optimization
A. Switch to Wired Connection:
Utilizing a wired Ethernet connection instead of Wi-Fi can significantly enhance the stability and speed of your network connection. Ethernet cables provide a direct and consistent link between your console and the router, minimizing potential interference and signal fluctuations.
B. Router Configuration:
Update your router’s firmware to the latest version available from the manufacturer’s website. Access your router’s settings and enable QoS to prioritize gaming traffic over other data transmissions, ensuring smoother gameplay and reduced latency.
C. Network Bandwidth Management:
Limit bandwidth consumption by other devices on your network during gaming sessions. Pause or schedule downloads and updates on other devices to prevent them from hogging bandwidth, especially during peak gaming hours.
2. Hardware Maintenance
A. Console Ventilation:
Ensure proper airflow around your gaming console by keeping it in a well-ventilated area. Clean the vents and fan regularly to prevent dust buildup, which can obstruct airflow and lead to overheating issues.
B. Firmware and Driver Updates:
Regularly check for firmware updates for your gaming console from the manufacturer’s official website or through the console’s system settings. Update the drivers for peripherals such as controllers and headsets to maintain compatibility and stability with Overwatch 2.
C. Temperature Management:
Monitor the temperature of your console during gameplay using built-in diagnostic tools or third-party applications. Invest in additional cooling solutions such as external fans or cooling pads to prevent overheating, especially during extended gaming sessions.
3. Software Solutions
A. Background Application Management:
Close unnecessary applications and processes running in the background to free up system resources for Overwatch 2. Use task manager or system monitoring tools to identify resource-intensive applications and terminate them before launching the game.
B. File Integrity Verification:
Perform a file integrity check through the console’s settings menu to identify and repair any corrupted or missing game files. This process ensures that Overwatch 2 is installed correctly and all necessary files are intact, reducing the likelihood of client-requested disconnects.
C. Update Management:
Enable automatic updates for Overwatch 2 to ensure that you have the latest patches and bug fixes installed. Regularly check for updates to your console’s operating system and system software to maintain compatibility and stability with the game.
4. DNS Configuration
A. Custom DNS Settings:
Access your console's network settings and manually configure custom Domain Name System (DNS) servers. Opt for reputable DNS servers such as Google DNS (8.8.8.8 and 8.8.4.4) or OpenDNS (208.67.222.222 and 208.67.220.220) to potentially improve connection stability and reduce latency.
B. Flush DNS Cache:
Occasionally, DNS cache corruption can lead to connectivity issues and client-requested disconnects. Open Command Prompt as administrator and type “ipconfig /flushdns” followed by Enter.
C. Router DNS Settings:
Alternatively, you can configure custom DNS settings directly on your router to apply network-wide DNS resolution. Refer to your router’s user manual or manufacturer’s website for instructions on accessing and modifying DNS settings.
How to Ensure Overwatch 2 Gaming Experience?
Embrace the next level of gaming prowess with LagoFast for Overwatch 2, where the pulse-pounding action meets unrivaled performance. LagoFast doesn’t just enhance your gaming experience, it revolutionizes it.
With its cutting-edge technology, every moment on the battlefield becomes more exhilarating than ever before. Say goodbye to lag and hello to uninterrupted gameplay with lightning-fast load times, ensuring you’re always one step ahead of the competition.
Seamlessly connect with fellow players across all platforms, immersing yourself in the camaraderie of the Overwatch community like never before. Plus, with its intuitive interface, optimizing your settings is as easy as a few clicks, leaving you more time to focus on dominating the game. Stay at the forefront of the gaming landscape with regular updates and unwavering support from LagoFast.
Don’t settle for mediocrity when you can elevate your gaming journey to new heights. Upgrade to LagoFast today and witness your gaming potential reach its zenith.
Follow the tutorial to use LagoFast for a smooth gaming experience:
Step 1: Click the Free Trial button to download and install LagoFast.
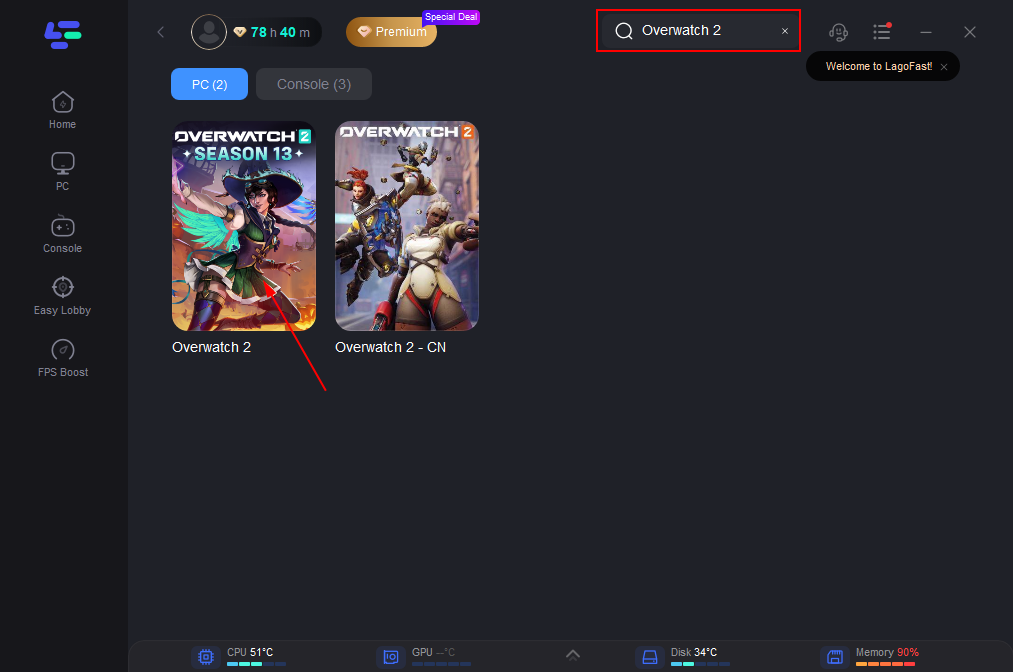
Step 2: Open LagoFast then click the PC button on the left and search Overwatch 2 in the search bar, click it after appearing.
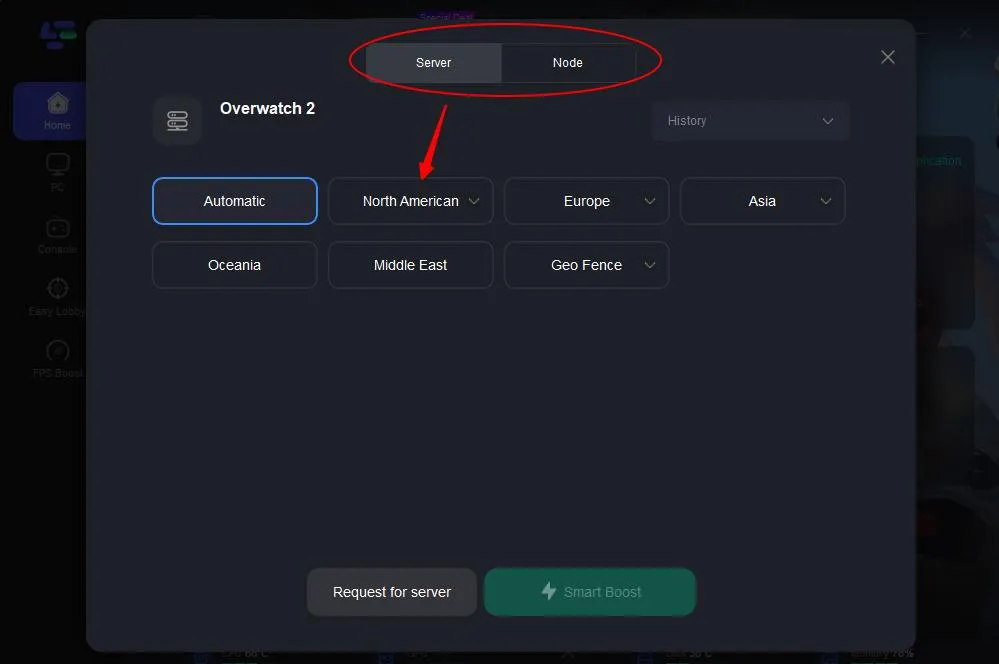
Step 3: Click on “Server” to change to a better server that ensures smooth gaming, then click on “Smart Boost”.
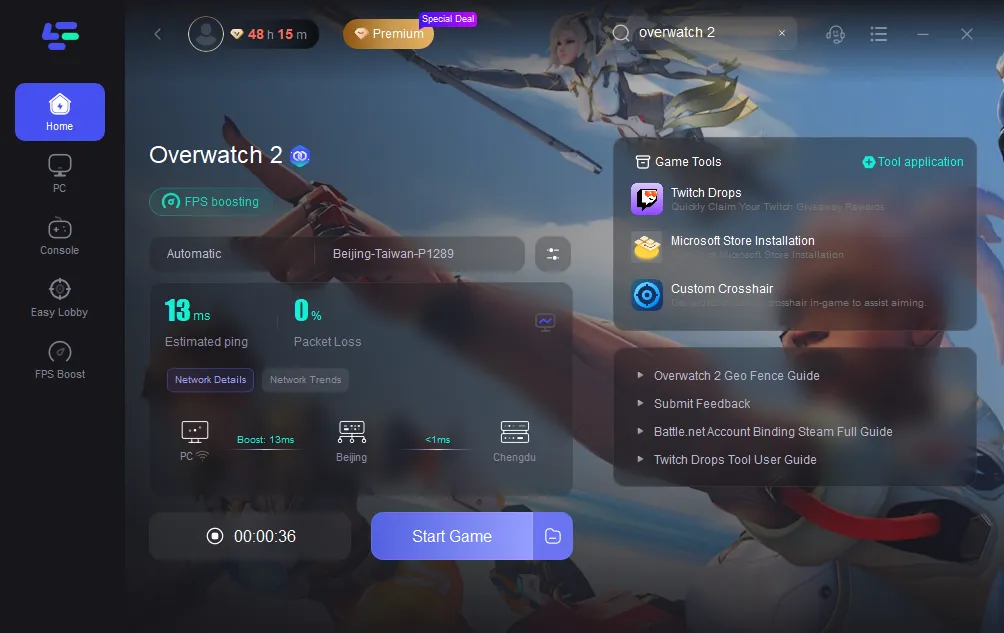
Step 4: Check the specific game ping, packet loss, and multiple path connection on the right side. Finally, click the “Start Game” to play the game.
Conclusion
By implementing these tips and strategies, you can elevate your Overwatch 2 gaming experience to new heights. Whether you’re aiming for competitive dominance or simply enjoying casual matches with friends, optimizing your gaming experience by using LagoFast is the best choice. So, assemble your team, and prepare for an unforgettable journey in the world of Overwatch 2 by using LagoFast!

- ✅ Reduce Lag and High Ping.
- ✅ Boost FPS at the Same Time.
- ✅ Support 2000+ Popular Online Games.
- ✅ Support Easy Lobby in all Cod Games without Lag

Boost Your Game with LagoFast for Epic Speed
Play harder, faster. LagoFast game booster eliminates stutter and lags on PC, mobile, or Mac—win every match!
Quickly Reduce Game Lag and Ping!
Boost FPS for Smoother Gameplay!