If you play Destiny 2 regularly, then you must have encountered a situation where data packets sent from your system to the game server or vice versa do not reach their destination. That kind of error is called packet loss, as it could cause the game to lag.
The Destiny 2 packet loss issue usually occurs due to physical snags, network congestion, or faulty hardware, on either your system or the game server. But the good news is there are several you can get rid of it quickly and easily. Read the article on this page to find out more.
What is Destiny 2 Packet Loss?
Destiny 2 Packet loss is an error that occurs when the data packets sent or received by a player never make it to their destination. This usually causes a desync that results in increased latency or total disconnection of the player from the game server.
Why Are You Suffering Destiny 2 Packet Loss
The main reason why you might experience Destiny 2 Packet loss error is network congestion. Network congestion is a situation where a network is trying to handle overloaded hardware, thereby causing a slowdown in the game performance.
You can also encounter Destiny 2 bad packet errors due to faulty hardware or physical obstruction.
Most Effective Way to Reduce Destiny 2 Bad Packet on PC
The most effective way to reduce Destiny 2 packet loss is by using advanced software like LagoFast. It's a game booster designed to help players enjoy an ultimate gaming experience.
Having been in the industry for close to a decade, LagoFast has been the go-to tool for both advanced and regular gamers to get rid of stuttering, lagging, and packet loss error when gaming on their PC. It uses advanced technology to reduce ping and provide players with a lag-free gaming experience.
Besides, unlike regular online game boosters, LagoFast can come in handy to reduce packet loss, eradicate lag, and do lots more in more than a thousand of the latest game you can ever think of, including Destiny 2, Call of Duty, Fortnite, Warzone, FIFA 23, and many others.
Key Features:
- It can be used on more than 1000 popular games, including Fortnite, FIFA 23, COD, etc.
- Boasts affordable plans, including a pay-per-minute plan.
- Outstanding game servers with global coverage.
- Increase FPS while reducing ping value.
- Facilitate smart routing and precise boosting.
Step 1: Install the LagoFast software on your PC and set it up. launch it and select Game Boost from the relevant area.
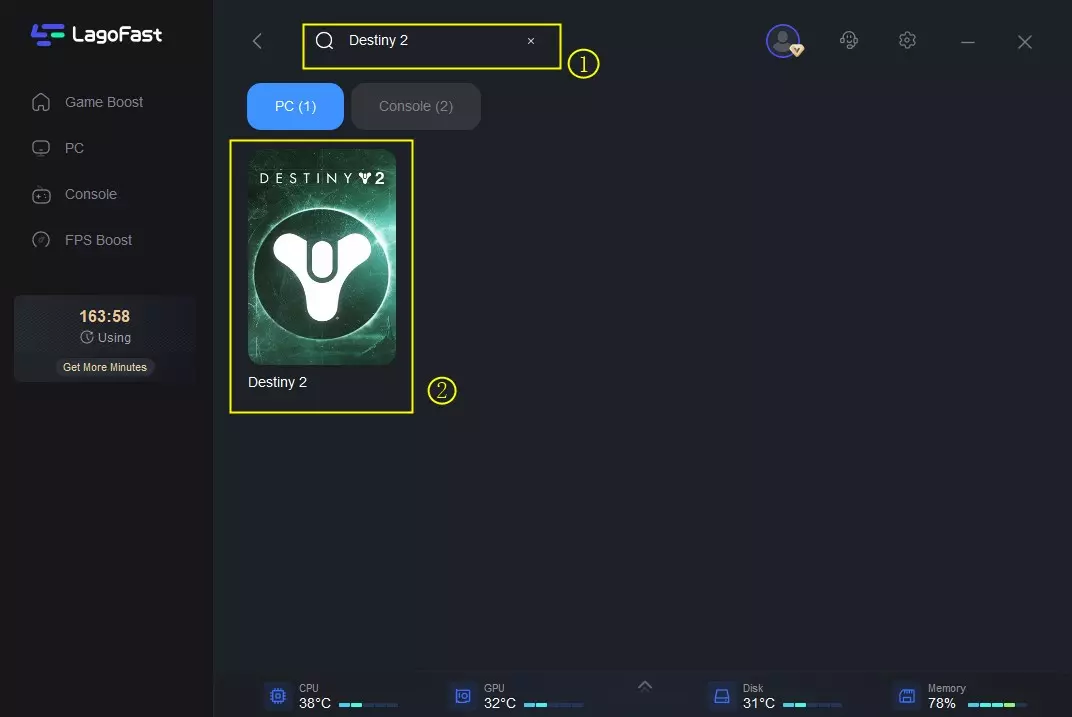
Step 2: Start LagoFast and click Game Boost from the top-left side. Then, use the search bar to search the name of the game you wish to reduce its packet loss. In this case, we searched ‘Destiny 2’.

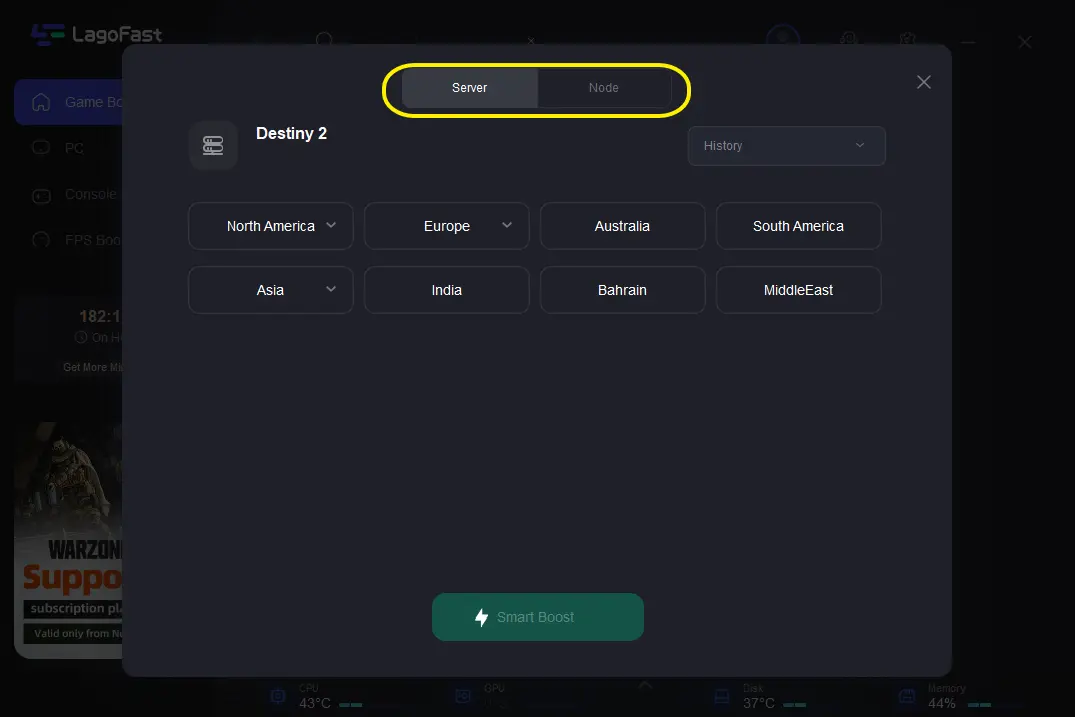
Step 3: Select a server that's the same as your game’s server on the new screen. But make sure the server you select is very close to your region.

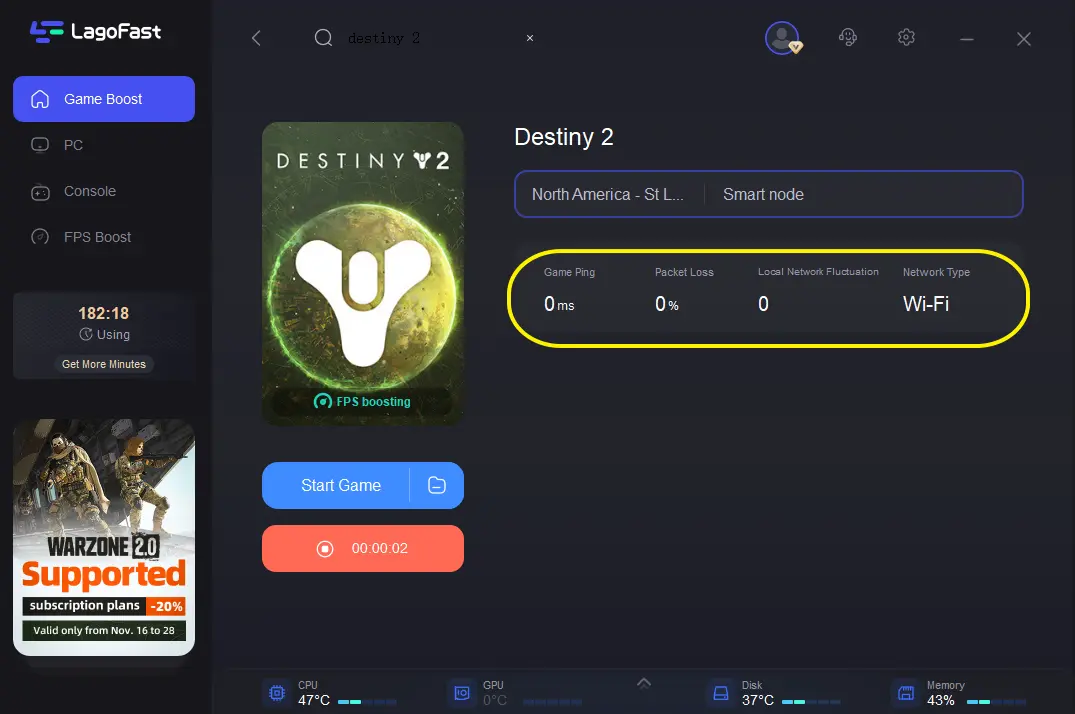
Step 4: After you complete the above, click Smart Boost button to wipe out errors causing Destiny 2 packet loss.

More Ways to Fix Destiny 2 Packet Loss
If you don't want to install third-party software to fix Destiny 2 bad packet. There are other methods you can employ to approach the problem. Read on to find out how they work.
Fix 1. Update Network Drivers
One of the common reasons why some people face packet loss problems is due to outdated network drivers. Sometimes, Windows does not update network drivers, and this usually causes problems when playing Destiny 2.
The steps below explain how to update the network driver;
Step 1: Navigate to Start Menu and type Device Manager in the search bar. Then, click on it.
Step 2: Locate the Network Adapter option and click on the bottom arrow next to it.
Step 3: Find your Network Adapter model. It could be either Realtek, Killer, or Intel.
Step 4: Once you discover the model, visit the official website via your browser. Then, download the driver.
Step 5: Install the downloaded Driver on your PC and follow the on-screen instruction to complete its setup.
Step 6: Finally, restart your PC and check if the Destiny 2 packet loss error is eliminated.
Fix 2. Switch to a new Ethernet Cable
If the ethernet cable you're using is faulty, chances are you’ll experience a packet loss error while playing Destiny 2. So, if this is the case for you, we recommend you get a new ethernet cable
Conclusion
There you have it. Reducing Destiny 2 packet loss is not as difficult as most people think. As you can see from the article above, there are different methods you can use to fix the issue. All you just need is to follow the steps attached to your preferred solution to get the job done perfectly. Though we recommend using LagoFast for a faster and easier fix.

Boost Your Game with LagoFast for Epic Speed
Play harder, faster. LagoFast game booster eliminates stutter and lags on PC, mobile, or Mac—win every match!
Quickly Reduce Game Lag and Ping!
Boost FPS for Smoother Gameplay!

