Are you ready to embark on an epic journey through the realms of Solo Leveling: Arise? This groundbreaking MMORPG has captured the hearts of gamers worldwide with its immersive gameplay and captivating storyline. However, one of the most common challenges faced by players is navigating the server system. Whether you’re looking to join friends in a different region or seeking a fresh gaming experience, changing servers in Solo Leveling: Arise is the key to unlocking endless possibilities. In this comprehensive guide, we’ll walk you through the steps to seamlessly transition to a new server and ensure that you can enjoy the game to its fullest potential, regardless of your location.
Part 1: Why You Need to Change Solo Leveling: Arise Server Region
Each server represents a distinct geographical region, catering to players from specific locations across the globe. While this system fosters a sense of community among players, it can also pose limitations for those seeking to connect with friends or access content exclusive to other regions.
Perhaps you’re looking to join forces with friends who are playing on a different server, or maybe you’re seeking a more vibrant gaming environment with a larger player base. Additionally, some players may encounter performance issues or connectivity problems on their current server, prompting them to explore alternative options. Whatever your motivation may be, rest assured that changing servers regions is a straightforward process that can greatly enhance your gaming experience.
Part 2: How to Change Server in Solo Leveling: Arise With LagoFast
Firstly, using LagoFast Game Booster is recommended for switching servers in Solo Leveling: Arise. Compared to manual changes, LagoFast ensures quicker server switches without impacting your game’s ping, keeping gameplay smooth. More importantly, LagoFast is a cross-platform game booster, so you can enjoy smooth gaming on different platforms including PCs, mobile phones, and consoles. It’s an all-in-one booster that’s user-friendly. Not only does it aid in server changes, but it also resolves game issues like lag and high ping, ensuring uninterrupted play. With advanced data transfer, LagoFast identifies and optimizes network connections for stable, low-latency networks with just one click. It boasts top-notch servers and network nodes in over 60 countries and 150+ cities globally, guaranteeing optimal performance no matter where you are. Additionally, it's more cost-effective and offers a wider range of subscription options compared to other boosters. So, size the chance to use LagoFast to change servers for a smooth gaming experience.
Tutorial to change servers in Solo Leveling: Arise with LagoFast:
Step 1: Download LagoFast by clicking the Free Trial button then install and open LagoFast.
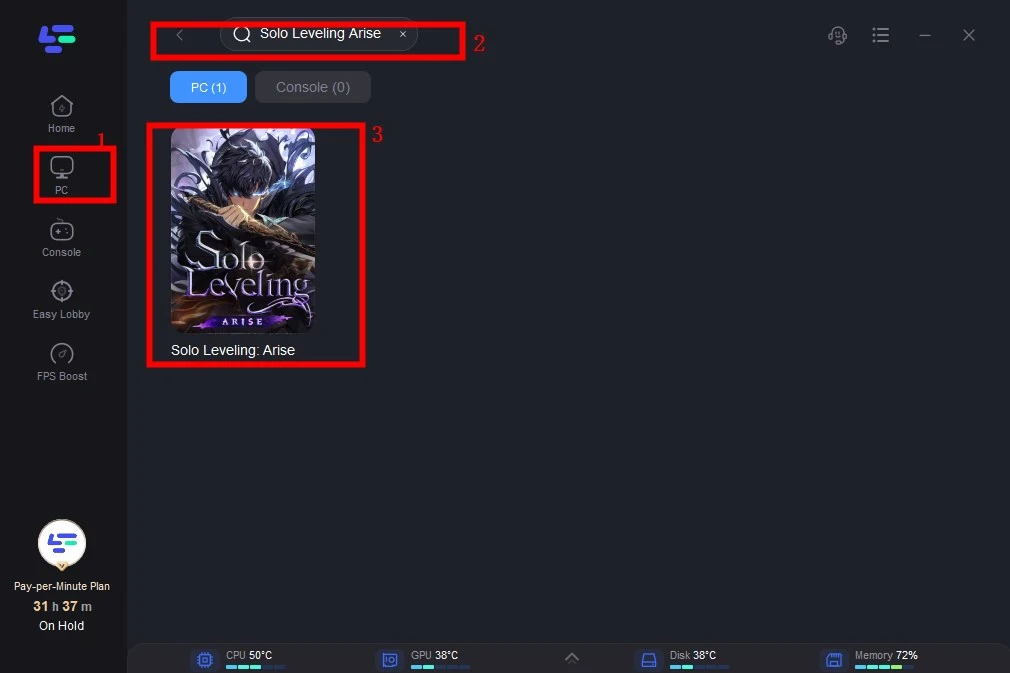
Step 2: Click the “PC button” on the left, and search for Solo Leveling: Arise on the search bar, and click it after being presented.

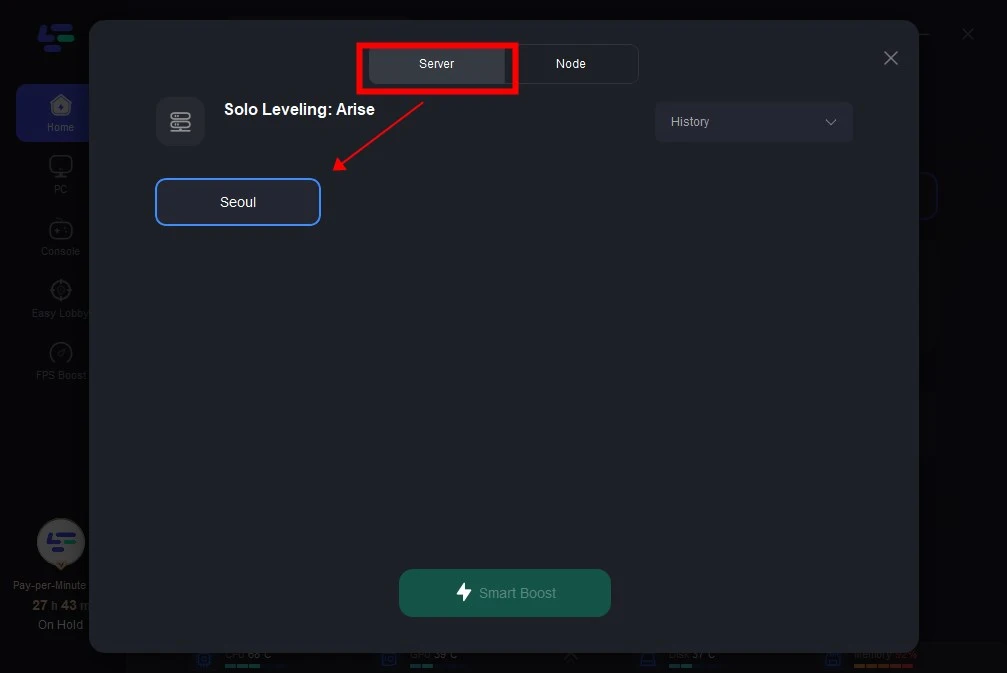
Step 3: Click on “Select Server” to change to a better server, then click on “Node” on the right to get a stable Node.

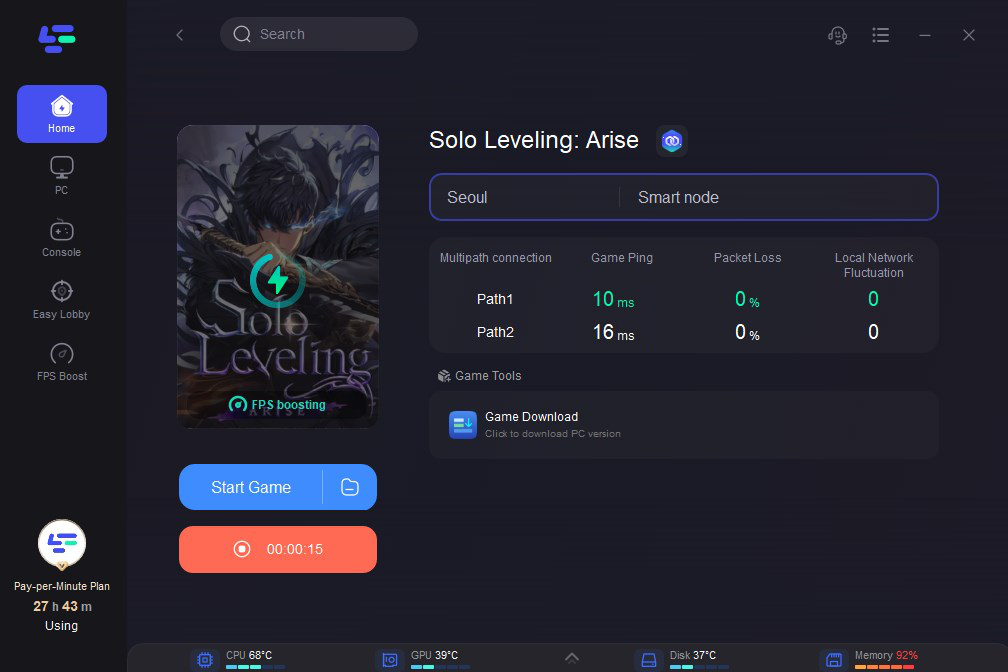
Step 4: Click the “Smart Boost button” to check the specific game ping, packet loss, and network type. Click the “Start Game button” to play the game.

Conclusion
In conclusion, changing servers in Solo Leveling: Arise is a simple yet powerful solution that allows players to transcend geographical barriers and connect with gamers from around the world. Whether you’re looking to team up with friends, explore new gaming communities, or overcome technical challenges, the ability to change servers empowers you to tailor your gaming experience to suit your preferences and objectives. By following the steps outlined in this guide and leveraging LagoFast, you can seamlessly transition to a new server and unlock the full potential of Solo Leveling: Arise, regardless of your location.

Boost Your Game with LagoFast for Epic Speed
Play harder, faster. LagoFast game booster eliminates stutter and lags on PC, mobile, or Mac—win every match!
Quickly Reduce Game Lag and Ping!
Boost FPS for Smoother Gameplay!

