Do a ping test on PC
If you want to test your computer connectivity or check the quality of your internet connection, all you need to do is perform a ping test.
If you are experiencing a connectivity issue, you'll be able to tell if this is limited to your local network (your home or office setup) or if the problem goes beyond (your internet service provider, host network, or a particular website).
Here's how to do a ping test on a Windows 10 PC and how to read the results.
For Windows 10, go to Search in the taskbar and:
1. Open the Windows Search Bar.
2. Then type CMD or Command Prompt into the search bar and click Run as administrator.

3. Type ping followed by a space and an IP address or domain name.
We suggest the following four common IPs that can be used
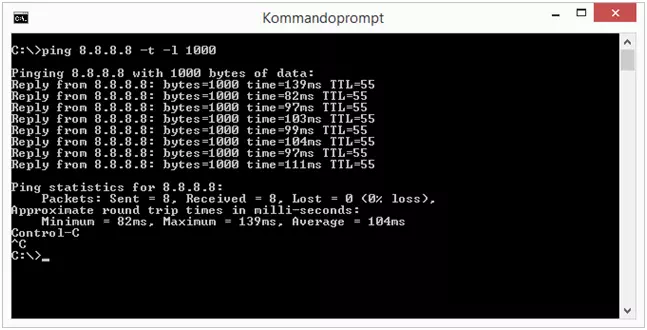
①ping 8.8.8.8
②ping 1.1.1.1
③ping www.google.com
④ping www.facebook.com

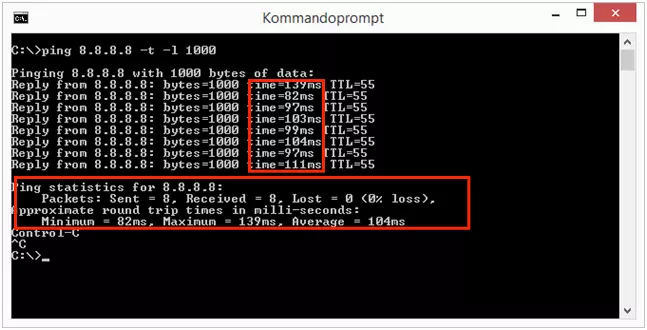
When you do a ping test on a Windows 10 PC, you will see the results for four different ping tests. Each test will tell you the ping time in milliseconds (ms) and how many packets were received or lost. You will also see the minimum, maximum, and average ping response times.

If one of your ping tests showed that packets were lost or one ping response took a lot longer than the others, it could be a sign that there is a problem with your connection.
Common Ping Error Messages
Here are the most common error messages you will see if your ping test returned failed results:
- Request timed out: This means the ping test took longer than the default limit of 4,000 milliseconds (4 seconds). This could be caused by network congestion, a firewall set to stop specific traffic, defective cables or ports, and more.
- Unknown host: This error message means that the requested host name is not recognized. Check that the name is entered correctly and that your router is functioning properly.
- TTL expired in transit: The TTL you see after your ping time for each test refers to the number of “hops” that your packet is allowed to make before being discarded. So, this error message means that your packet exceeded the maximum number of allowable hops.
- General failure: This either means your computer does not have the proper TCP/IP settings or that there might be a problem with your local area network (LAN) adapter or drivers, such as your router or WiFi card.
- <destination> is unreachable: This message means that there is no route to the destination. If the message says, “Reply from <destination>: Destination Host Unreachable,” that means that there was a routing problem at the remote router, not with the <destination> itself.
If you get the above error message when performing a ping test, it may mean that there is a problem with your network connection and we suggest you try the following.
1. You can try to ping other devices or other domains to see if the problem persists. This will help you determine whether the problem is with your device or with your network connection.
2. Try switching wired networks or WiFi connections and compare the network connection status, choose the more stable one.
3. If neither of these methods resolves the problem, contact your network operator for assistance.